An illustration (created using Gemini) representing the process of building an online portfolio.
A Guide to Building a Remote Sensing & GIS Portfolio on GitHub Pages
Showcasing your work is one of the most effective ways to demonstrate your skills, especially in a specialized field like Remote Sensing and GIS. Instead of relying solely on a resume, I decided to build a dedicated online portfolio. This blog post outlines my journey, from choosing the right tools to deploying the final website, all for free using GitHub Pages.
My goal was simple: create a clean, professional, and easily accessible portfolio to highlight my projects. I wanted something that was fully under my control, didn't require complex backend servers, and could be version-controlled. Using a combination of plain HTML, CSS, and GitHub Pages was the perfect fit.
The Planning & Design Phase
Before I wrote a single line of code, I spent a lot of time on research and planning. The first step in my journey was to create a PDF portfolio to compile all my projects and content in a single place. With the content organized, I was ready to think about how to present it online.
I started by exploring different options for hosting a portfolio, including platforms like Wix and WordPress, setting up a personal website, and using static site hosting services. I ultimately chose GitHub Pages for its flexibility and cost-effectiveness.
To get a sense of what a great GIS portfolio looks like, I studied several examples. I found inspiration in portfolios shared by Ujaval Gandhi, which helped me understand different layouts and content strategies.
- https://www.pokateomaps.com/portfolio
- https://cawilliams719.github.io/
- https://www.alicias.io/
- https://dev.joelmasselink.com/portfolio/
With these examples in mind, I outlined the core sections I needed for a comprehensive portfolio:
- A prominent header with my name, title, and a clear navigation menu.
- An "About Me" section with a professional photo and a brief summary of my experience.
- A "Projects" section to showcase my work with a grid of cards, each linking to a more detailed case study.
- A "Skills" section to list my proficiency in software, programming languages, and geospatial concepts.
- A "Contact" section with links to my email, LinkedIn, and GitHub profiles.
The Technical Implementation
Step 1: Structuring the Pages with HTML
I started by creating the main page, index.html. I focused on using semantic HTML5 tags like <header>, <main>, <section>, and <footer> to create a logical and accessible structure.
For the project showcase, I used a grid of <div> elements, each with a class of project-card. This made it easy to apply consistent styling. The "View more details" link on each card pointed to a separate HTML file in a projects/ subfolder (e.g., projects/tnhms.html). This modular approach kept my main page clean and allowed for in-depth project descriptions.
Step 2: Styling with CSS
The look and feel of the portfolio were crucial. In my style.css file, I used a few key techniques to keep the design clean and responsive:
**CSS Variables:**I defined colors, border-radius, and box shadows in a:rootblock. This made it incredibly simple to maintain a consistent theme and make global changes quickly.**Flexbox and CSS Grid:**For the navigation bar and the projects/skills sections, I used Flexbox and CSS Grid to create dynamic, responsive layouts. A single line of code likedisplay: gridordisplay: flexmade my life much easier than using floats or other older methods.**Media Queries:**To ensure the site looked great on a mobile phone, I used@mediaqueries to adjust font sizes and change the layout to a single column on smaller screens.**Font Awesome:**For professional icons next to skills and contact links, I linked to Font Awesome. It's a quick and easy way to add visual flair.
Step 3: Creating Detailed Project Pages
Each project deserved its own space to shine. I created individual HTML files like sm.html and tnhms.html in a projects folder. These pages followed a similar template, with sections for:
- Project Overview: A brief summary and a key image.
- Project Details: Lists of my role, the tools used, and my specific contributions.
- Selected Visuals: A gallery of high-quality maps, charts, and GIFs from the project.
Visuals from the Portfolio Build
Here are some visual examples of the finished portfolio and its structure, to give you a better idea of how it all came together.
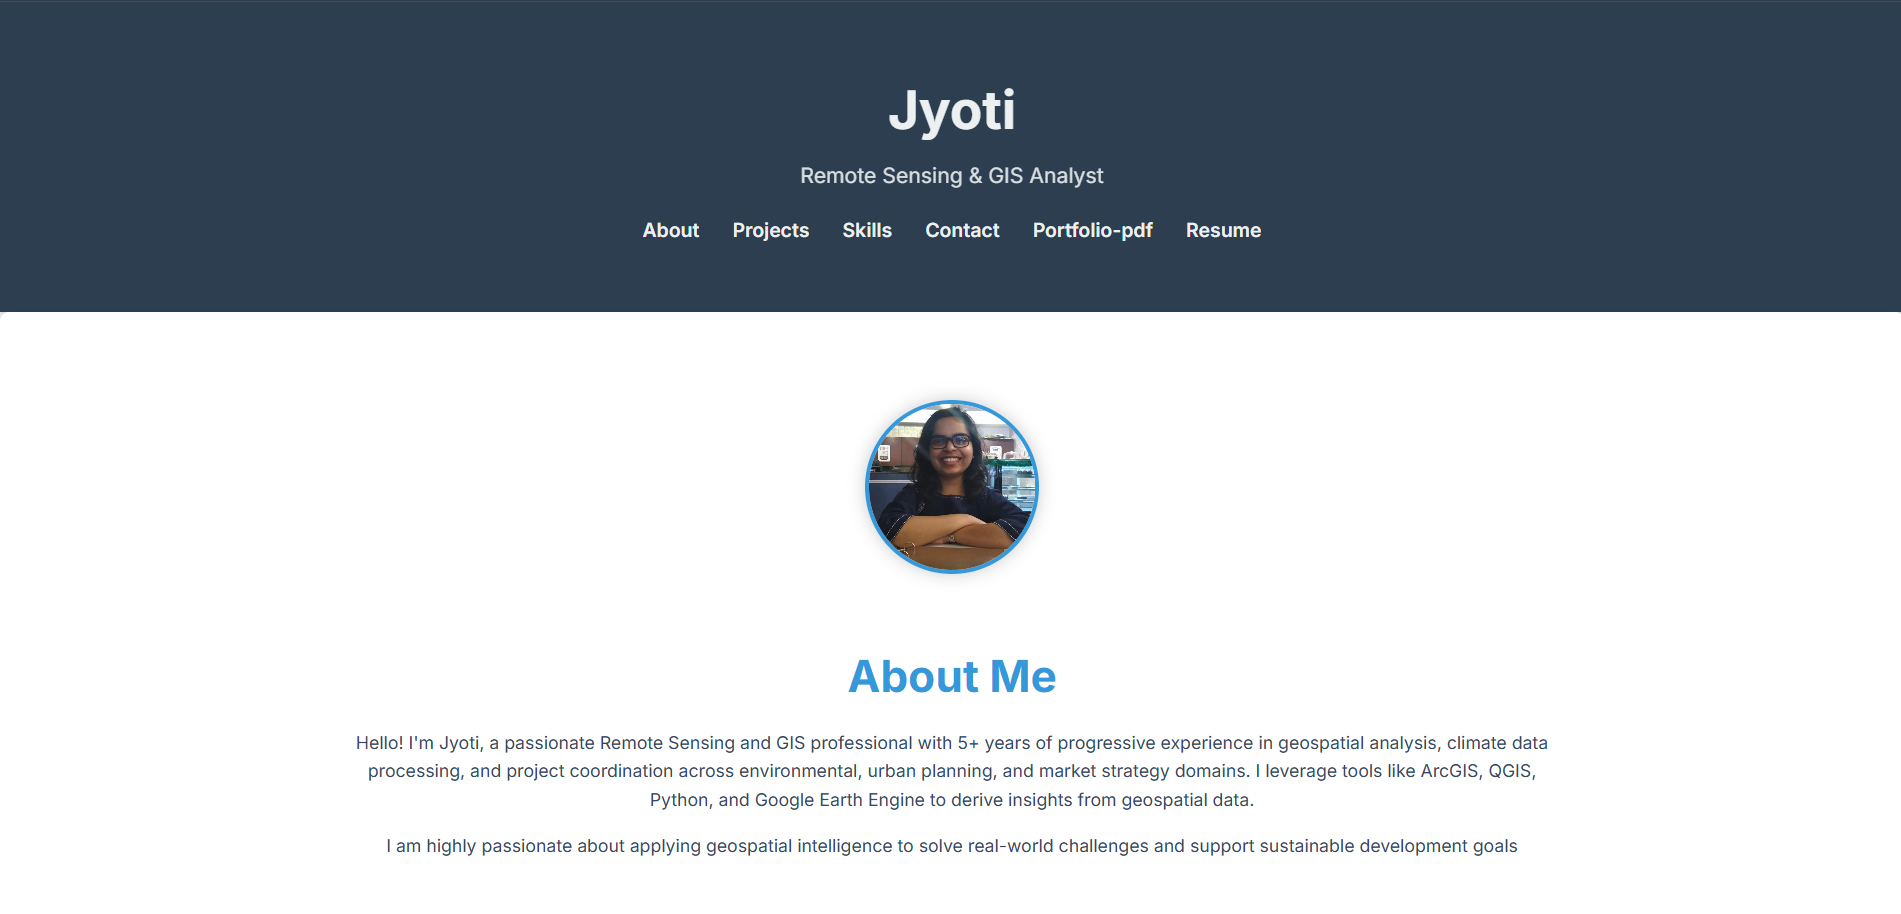
A screenshot of the finished portfolio homepage, demonstrating the clean layout and responsive navigation.
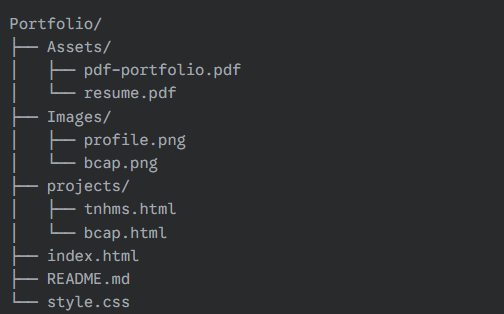
The file structure, showing how the HTML and CSS files are organized, with project pages in a separate sub-folder.

A visual representation of the portfolio's responsive design, showing how the layout adapts for mobile viewing.
How Gemini Helped Me Build This
I didn't build this portfolio alone. A key partner in my development process was Gemini. From initial brainstorming to solving specific coding challenges, Gemini provided invaluable assistance.
- Initial Structure and Scaffolding: I used Gemini to help me with the initial HTML structure for
index.html. By providing the content I wanted to include, it helped me organize the page into logical sections like "About," "Projects," and "Skills." - CSS and Responsive Design: Gemini helped me create the foundational CSS (
style.css), providing the clean, professional look I wanted. It also guided me on how to use modern CSS features like Flexbox, CSS Grid, and media queries to ensure my portfolio looked great on both desktop and mobile devices.
Working with an AI assistant like Gemini streamlined my workflow, acted as a coding consultant, and ultimately helped me create a better final product.
My Key Takeaways
Building this portfolio from scratch was a rewarding experience. It not only gave me a professional platform to display my work but also reinforced my fundamental web development skills. The process taught me that with a solid plan and a few key tools, creating a polished online presence is both achievable and highly valuable.
If you're in a technical field and don't have a portfolio, I highly recommend this approach. It’s a powerful way to show, not just tell, what you can do.